
Unity Interface Introduction

Unity Interface Introduction
Hello to you all from one of the posts I think will be quite long, in this article I want to talk to you about the Unity interface as best I can and try to explain, for better or worse, what we use and where when designing a game. Let’s keep it short and move to our interface.

On the far left is the Hierarchy, in the middle the scene and camera view, on the far right the Inspector (I guess we can call it Properties), below the middle the console and files, at the top are the tools that allow us to interact with objects, and above that buttons that allow us to interact with the editor.
Let’s get to know these objects visually too.
Hierarchy Panel
This is where the objects we use in the game and add to the scene are listed.


You can see all the objects in our scene here and can right-click on a blank area or an object to add new objects, copy or delete an existing object.
Apart from right-clicking to create standard objects, you can also add your own created objects to the scene by dragging them here.
Inspector Panel
This is the panel where we can see the properties of any object we have added or not added to our scene in our game, assign properties, and modify settings.


Are there ways other than assigning from here? Of course there are, for example, it is possible to assign a Component to an object using a script, but that's not the topic for now, so I’ll skip it.
To assign a Component to an object, you can either click Add Component or drag and drop Components such as a Script file into this Inspector panel.
Scene, Game and Animator Panel
 |
| Scene Panel |
Scene Panel
This is the area where we place objects in the game and can set details such as position sticking closely to a free camera.
More accurately, I can tell you this is the place where we build the area to be played by the player.
We can choose Shaded mode and make desired layers visible, or make unwanted layers invisible in this panel.
 |
| Game Panel |
Game Panel
This is where we see the game from the player’s camera. The game is viewed in this panel as the player sees it and our tests are made according to this.
Thanks to this screen, we get visual feedback on what our game will look like according to the screen size, or rather, at what resolution.
 |
| Animator Panel |
Animator Panel
This is the area where we can create animations that we will use in the game with Unity and link those animations together.
Project and Console Panel
 |
| Project Panel |
Project Panel
The Project panel is where we can see all the files in our project, and see our prepared prefabs.
The objects we delete in this panel are sent to our computer's recycle bin, so this is where we are working with real files.
There will be many files here, and my suggestion for your projects is to keep the files in this panel organized.
 |
| Console Panel |
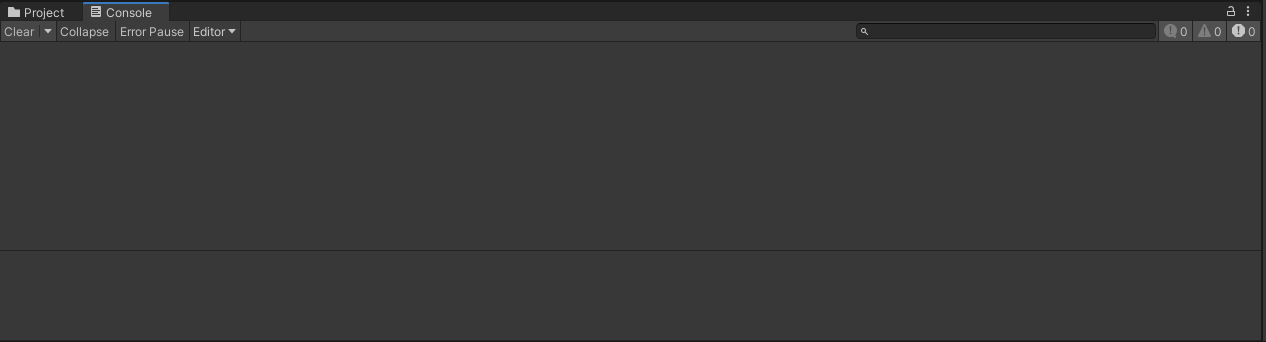
Console Panel
This panel is one you will be dealing with frequently during the development of a game; it's the area you use to ensure that objects interact with each other during development and where errors are logged.
Tools That Allow Us to Interact with Objects (Toolbars)

Transform Tools
This is the box that contains the tools Hand, Move, Rotate, Scale, Rect, Move - Rotate or Scale tool and Edge editing.
- Hand Tool
- This tool allows you to move freely on the editor
- Move Tool
- This tool allows you to move the selected object on the x, y, and z coordinates
- Rotate Tool
- This tool allows you to rotate the selected object on the x, y, and z coordinates
- Scale Tool
- This tool allows you to scale the selected object on the x, y, and z coordinates.
- Move - Rotate or Scale Tool
- This tool allows you to do all of the above three functions at the same time on the selected object.
- Edge Tool
- This tool allows you to edit the points of the Collider on the selected object.

Toogle Tools
- Handle Positions
- Allows rotations, movement, and such actions to be made according to the pivot point of the selected object or its center.
- Handle Rotations
- This tool changes what the rotation operation will be based on.
- Grid Snapping
- When enabled, it makes the selected object move snapped to lines on the scene.
- This feature is generally used when placing objects on a map in games, to prevent objects from overlapping, etc.
Editor Buttons

This is one of the places we use most. (If you've memorized the keyboard shortcuts, that's different..)
There are many buttons in this panel, each lined up, so let's see which panels they open and what they affect.

File
- Open new scene
- Open existing scene
- Save
- Save as
- Create new project
- Open existing project
- Save project
- Build settings (Output settings)
- Build and run
- Exit

Edit
- Undo
- Redo
- Select all
- Deselect
- Select children of selected (Think of it like selecting the children in the family)
- Select prefab
- Transform selection
- Cut
- Copy
- Paste
- Paste as child
- Copy
- Rename
- Delete
- View scene
- View selected
- When you select this, even if you move the object, the scene will always follow it
- I couldn't quite explain but the best way to learn is by trying, I suggest you try
- Find
- Play
- Stop
- Step
- I also suggest you try this
- Sign in to your Unity account
- Sign out of your Unity account
- Allows saving of scenes etc. and then switching quickly via shortcut keys
- Project settings
- Editor settings
- Shows shortcut keys
- Deletes all user prefabs
- Shader options
- Grid settings
- Opens the panel where you can edit the grid in the scene

Assets
Note: The objects and files used in the game are called Assets.
- Create asset
- Show on folder
- Open
- Delete
- Rename
- Copy folder path
- Open in scene
- Show in package manager
- Import new assets
- Import packages
- Export packages
- Find reference in scene
- ...
- Refresh
- Reimport
- Reimport all
- Sometimes when our games throw errors for no reason, we use this.
- Export prefab
- ... (Never used it)
- ... (Never used it)
- ... (Never used it)
- Opens the Inspector window for the selected object
GameObject
Interacts with the Hierarchy, allows you to create and edit objects..
Component
This is the menu for separately adding the Components we add to the game via the Add Component button in the Inspector window.

Window
- Shows the panels open in the editor.
- You can close the open panels from here
- Go to the next window
- Go back to the previous window
- Shows layers
- Opens Collaborate features
- These features are for more advanced use, no need to know about it for now
- In a few words, it allows you to connect to Unity services.
- Asset Store
- Opens Unity Asset market
- TextMesh Pro
- This is a more advanced version of the Text found in UI.
- This lets you switch quickly between panels
The others are for activating tools such as sound, analytics, UI, etc..
Help
This button contains tools such as going to the Unity forum, viewing your license, and updating your Unity version if you are not using Unity Hub.
Yes, friends, that’s the end of our article, happy reading..
If you have anything you are curious about or stuck with, you can ask by leaving a comment.
Yorum Gönder