
Using Arduino with Visual Studio Code

Using Arduino with Visual Studio Code
Hello friends, today I will talk to you about how you can use Arduino with Visual Studio Code instead of its own editor.First, let’s download the programs we need
After downloading and installing the Arduino IDE, there’s nothing else we need to do with it. After installing Visual Studio Code, let’s move on to the settings we need to make.

Now, go to the settings page of the extension we just downloaded and open settings.json.


When we open the settings.json file, we need to edit its contents as follows.

It should look like the one above, but we are not going to add all of them. The lines we need to add are below.

When we add these, the system will automatically render it like above.
You need to specify where you installed Arduino in the "arduino.path" field here.
"arduino.path": "C:\\Program Files (x86)\\Arduino",
    "arduino.logLevel": "info",
    "arduino.enableUSBDetection": true,
    "C_Cpp.intelliSenseEngine": "Tag Parser",
Even after performing the above steps, your system still will not recognize the libraries; we need to define the libraries.
Now let’s open any ".ino" project we have created.
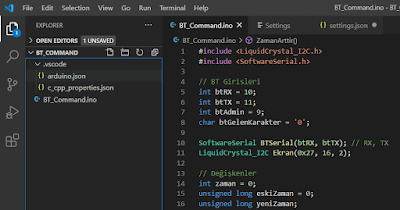

The content you see in the image above will greet you. Here, in the "includePath" section, we will add the folders of the libraries we use.
Note: Don’t forget to put \\** at the end of the library folder you add. If you do not do this, access to the data inside will not be possible and you will continue to get errors.
Yorum Gönder